

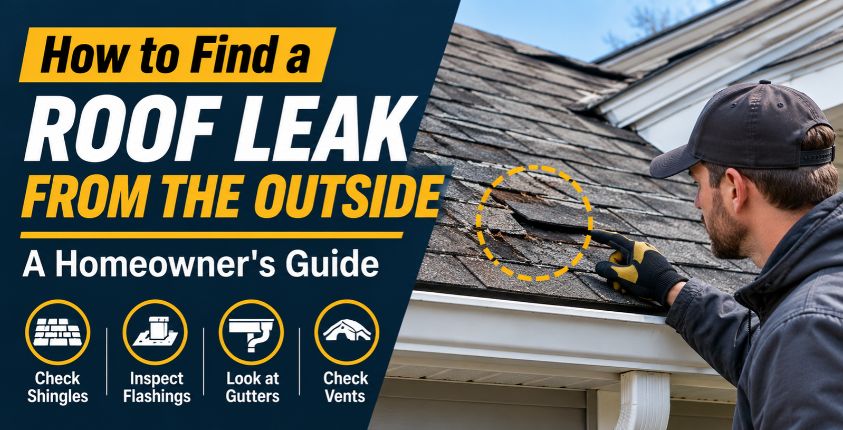
There’s a brown stain spreading across your bedroom ceiling, and it wasn’t there last week. Or maybe you heard a drip in the attic during last night’s rain. Either way, you know water is getting in somewhere, and now you need to figure out where.
Here’s the frustrating part. The spot where water shows up inside your house is almost never the spot where it’s coming in. Water runs along rafters, soaks through insulation, and travels sideways before it finally drips onto your ceiling. That’s why knowing how to find a roof leak from the outside is such a useful skill for any homeowner, even if you end up handing the actual fix to a professional.
This guide walks you through exactly how we’d approach it: what to check first, where leaks hide, and how to stay safe while you look.
Why Roof Leaks Are So Hard to Pin Down
Roofs are layered systems. You’ve got shingles on top, underlayment below that, then the roof deck, and finally your attic space. Water can sneak through the top layer and travel a surprising distance before it shows itself.
A leak that appears above your kitchen might actually start four or five feet up the slope, near a chimney. That’s normal. It’s also why guessing and slapping sealant on the nearest suspicious spot rarely works.
So the goal isn’t to look where the stain is. It’s to trace the water uphill and find where it’s entering.
Before You Start: Safety Comes First
We have to say this up front, because every year people get hurt trying to inspect their own roofs.
- Never climb on a wet roof. Wait for a dry, calm day. Wet shingles are slick as ice.
- Skip steep roofs. If the pitch is steep, or the roof is two stories or higher, stay on the ground and use binoculars.
- Use a ladder properly. Set it on firm, level ground and extend it at least three feet above the roofline.
- Wear shoes with real grip, and don’t go up alone.
Honestly, a lot of your inspection can happen from the ground and from a ladder without ever stepping onto the roof. If anything feels sketchy, that’s your cue to call someone.
Step 1: Start Inside, Then Work Your Way Out
It sounds backwards, but the best roof leak detection starts in your attic. On a dry day, grab a flashlight and look for:
- Dark stains or streaks on the underside of the roof deck
- Damp or compressed insulation
- Daylight peeking through the roof boards
- A musty smell or visible mold
Whatever you find, note where it is in relation to things like chimneys, vent pipes, and walls. That gives you a rough target area to focus on when you head outside. Taking a few photos on your phone helps, too.
Step 2: Do a Ground-Level Walkaround
Now head outside with a pair of binoculars. Stand back far enough to see the whole roof, then work your way around the house slowly. You’re looking for anything that just looks off:
- Shingles that are curled, cracked, or missing
- Dark patches or streaking
- Areas that look lower or uneven
- Bare spots where granules have worn away
- Debris piled up in valleys or corners
Pay extra attention to the area above the stain you found inside. Water usually enters higher up the slope than where it appears.
Step 3: Check the Usual Suspects
Most leaks come from a short list of trouble spots. Once you know them, you’ll find that how to find a roof leak from the outside becomes a lot less of a mystery.
Flashing
Flashing is the thin metal that seals the joints around chimneys, skylights, walls, and vents. It’s the number one source of roof leaks. Look for flashing that’s rusted, lifted, bent, or pulling away from the surface. Check the sealant too, since old caulk dries up and cracks over time.
Plumbing Vent Boots
Those little pipes poking through your roof have rubber collars around them. Rubber doesn’t last forever. After 10 to 15 years, it can crack and split, and rainwater runs right down the pipe into your house. It’s an easy thing to miss and a very common culprit.
Valleys
A valley is where two roof slopes meet, and it carries a huge volume of water during a storm. If the shingles or metal lining there are worn, damaged, or clogged with leaves and debris, water backs up and finds its way under the roofing.
Shingles
Look closely for cracked, buckled, or missing shingles. Check for exposed nail heads too. Nails that have backed out of the deck can push up and puncture the shingle above them, creating a tiny but steady leak.
Chimneys and Skylights
Both create openings in the roof that depend on flashing and sealant to stay watertight. Look for gaps, cracked mortar around the chimney base, or sealant that’s shrunk away from the edges.
Gutters
Clogged or sagging gutters can force water to back up under the edge of the roof, rotting the fascia and decking. If your gutters overflow every time it rains, take that seriously.
Step 4: Look for Subtle Signs of a Roof Leak
Not every leak is obvious. Some of the more subtle signs of a roof leak include:
- Moss or algae growth in one concentrated area, which suggests that part of the roof stays damp
- Granules in the gutters, a sign the shingles are wearing thin
- Soft or spongy spots if you do end up walking on the roof (another reason to be careful)
- Rust stains around metal components
Small clues like these often point you right to the source.
Step 5: Try the Water Test (With a Helper)
If you’ve narrowed things down but can’t confirm the exact spot, a controlled water test can help. It does take two people, and it takes patience.
- Have one person inside the attic with a flashlight and a bucket nearby.
- The other person stands outside and runs a garden hose over a small section of the roof, starting low and working upward. Stay in one area for several minutes before moving higher.
- When the person in the attic sees water coming through, you’ve found the entry point’s rough location.
The key is to go slowly and start at the bottom. If you soak the whole roof at once, you’ll never know which section is the culprit. Also, don’t spray water upward under the shingles, since that can force water in where it wouldn’t normally go.
Step 6: Mark the Spot and Document It
Once you think you’ve found the source, don’t tear into it right away. Take clear photos, note the location relative to landmarks like the chimney or ridge, and write down what you saw. If you’ve got chalk, mark the area lightly (from a safe position).
This record is valuable whether you plan to fix it yourself, call a contractor, or file an insurance claim.
Temporary Fixes While You Wait
If rain is coming and you can’t get a pro out right away, a temporary patch can limit the damage:
- A roofing tarp, secured properly, can cover a damaged section
- Roofing cement can seal small gaps around flashing or nail holes
- Inside, move belongings and use a bucket to catch drips, and poke a small hole in a bulging ceiling to release trapped water (carefully, and into a bucket)
Temporary measures are just that, temporary. They buy you time, but they don’t replace proper roof leak repair.
When to Call a Professional
Some situations are better left to experts:
- You can’t find the source after a thorough check
- The roof is steep, high, or in poor condition
- The leak keeps coming back after previous repairs
- You see sagging, widespread damage, or mold growth
- The roof is nearing the end of its life
If you’re in that last category, repairs may only be a bandage. Our guide on the 5 signs you need a new roof can help you work out whether repair or replacement makes more sense.
A trained roofer can often spot things a homeowner would miss, like failing underlayment, hidden rot, or ventilation problems that are making things worse.
How to Prevent Future Leaks
Once the problem’s fixed, a little maintenance goes a long way:
- Have your roof inspected once a year and after major storms
- Keep gutters clean and downspouts clear
- Trim overhanging branches that scrape the roof or drop debris
- Replace aging flashing and vent boots before they fail
- Address small problems quickly, before they spread
Catching a tiny issue early is almost always cheaper than dealing with water damage later.
Need Help Finding or Fixing a Roof Leak?
Tracking down a leak can eat up a whole weekend, and it’s not always safe or straightforward. At Weldon Roofing, we find the real source of the problem, explain what we see in plain language, and fix it properly so you’re not chasing the same leak next season.
If you’re dealing with a leak right now, contact us, and we’ll get someone out to take a look.
Frequently Asked Questions
Q1: Can I find a roof leak without going on the roof?
Yes, in many cases. Start in the attic to trace stains back to their source, then use binoculars from the ground to scan for damaged shingles, cracked flashing, or worn vent boots. A ladder gives you a closer look at lower sections without having to walk on the roof itself.
Q2: Where do most roof leaks come from?
The most common sources are damaged or poorly sealed flashing, cracked plumbing vent boots, clogged valleys, and missing or broken shingles. Chimneys and skylights are also frequent trouble spots because they rely on sealant and flashing to stay watertight.
Q3: Why does the leak show up far from where water enters the roof?
Water doesn’t drip straight down. It travels along rafters, roof decking, and insulation before finding a place to drip. That’s why the stain on your ceiling is often several feet away from the actual entry point on the roof.
Q4: How much does roof leak repair cost?
It depends on the cause and how widespread the damage is. A small fix like replacing a vent boot costs far less than repairing damaged decking or flashing around a chimney. A professional inspection is the best way to get an accurate estimate for your specific roof.
Q5: Is it safe to find a roof leak myself?
It can be, if you take precautions. Only inspect on dry days, avoid steep or high roofs, use a stable ladder, and never go up alone. When in doubt, use binoculars from the ground or call a professional to do it safely.